To organize a live course with your learners, follow these simple steps:
Start by clicking on the “Meetings” tab in the top menu of the page.
It will take you to the summary table of your meetings. In the top right, select the “Create a live class” button.
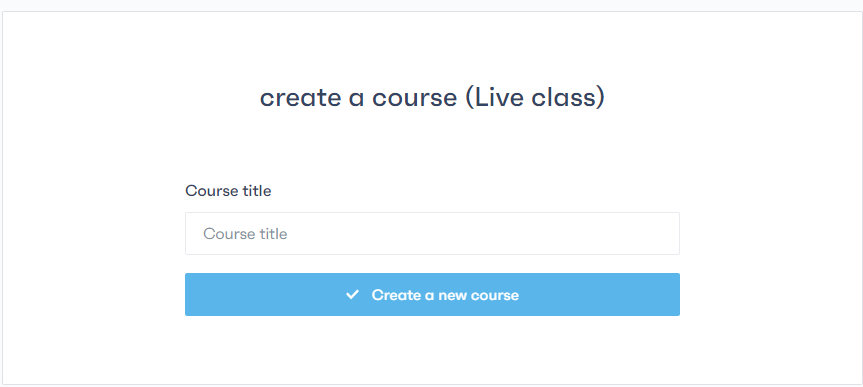
You will be redirected to a page where you need to enter the title of the live course. Then click on “Create a new course”.
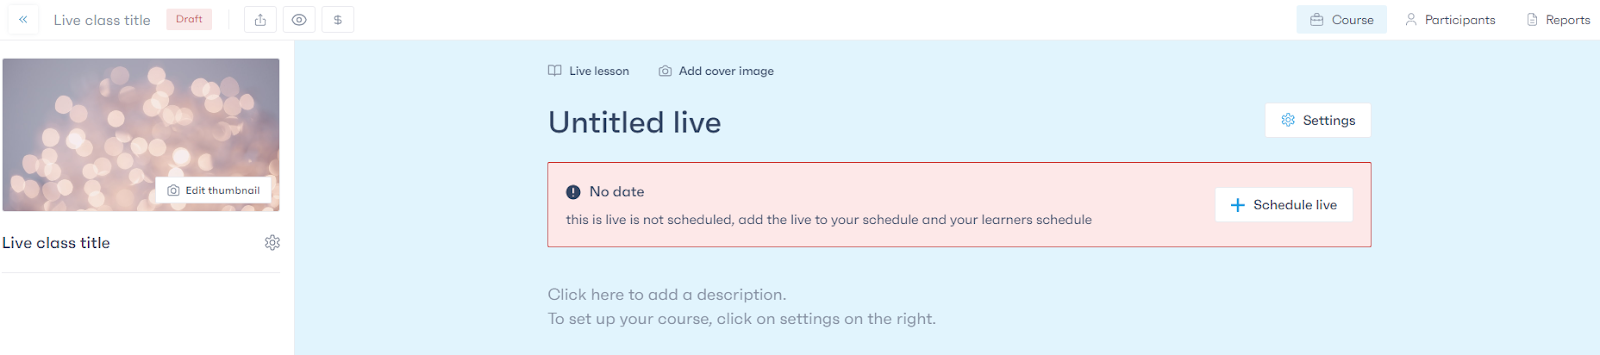
On the live course page, add a title for the live session and a description.
To schedule the live session, click on “Schedule a live session”. In the pop-up that appears, choose the broadcasting tool from our platform, Zoom, or any other tool you have added with an access link. Also, specify the date and time of the broadcast.